
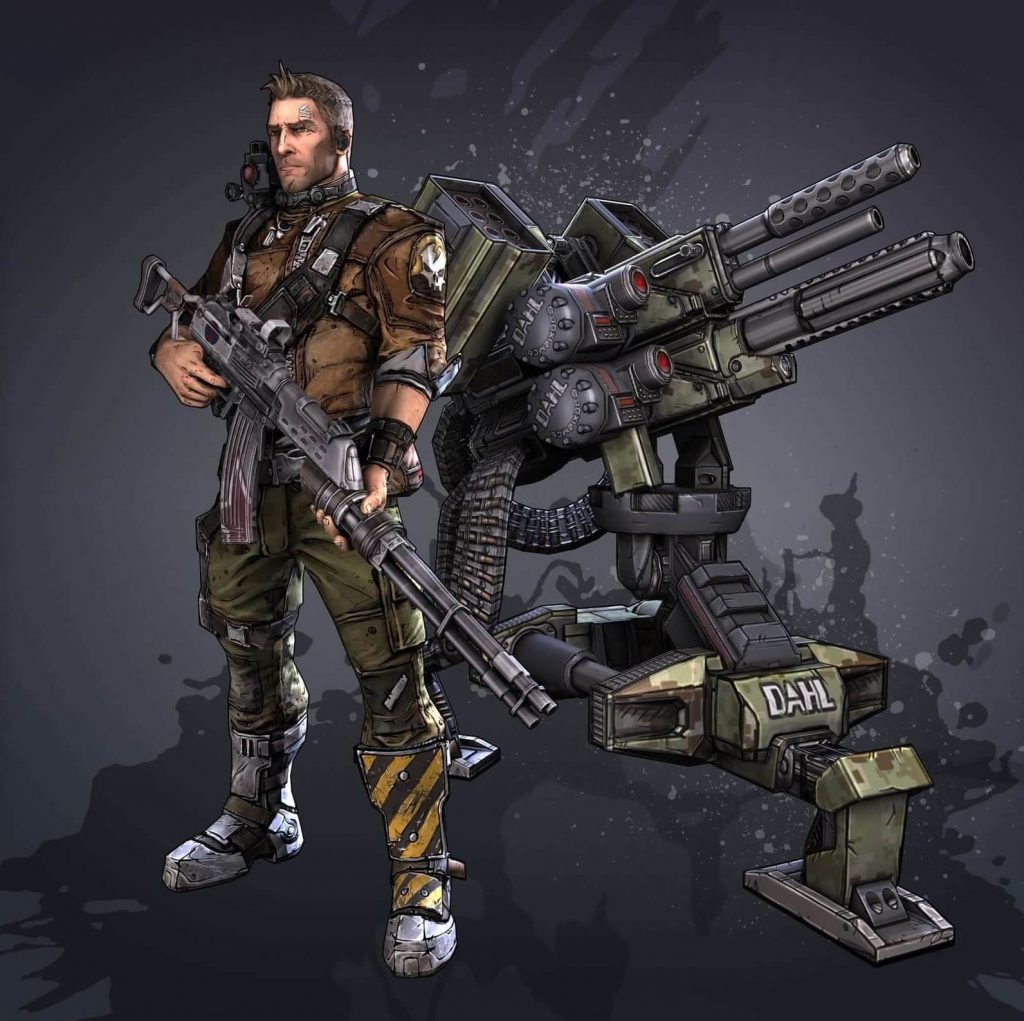
This BL2 Commando (Axton) Build is what I used to play the game in normal and true vault hunter mode, mainly solo with some co-op. A straight forward build and very handy in either case, with great survivability. The main skill tree is Guerilla for those playing to lvl 50 and Guerilla & Survival for those maxed @ lvl 72.
Axton is a great character for those wanting to play solo or those new to the game. Because the utility of his turret allows him to survive a great deal of battles. And provides a much needed boost and DPS in tight and unforgiving situations that you will inevitably face throughout your playthrough.
Read the Borderlands 2 – Survival Guide
And the Best Siren Build
|
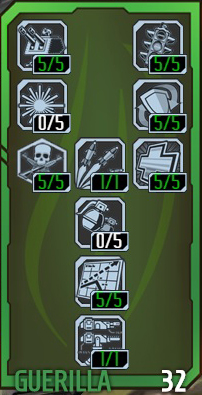
Ready: +40% Reload Speed. Willing: +75% Shield Recharge Rate and -60% Shield Recharge Delay. Scorched Earth: Adds Multi-Rocket Pods to your Sabre Turret. 22 Rockets per Volley. Onslaught: Killing an enemy gives you +30% Gun Damage and +60% Movement Speed for a short time. This is a key skill. Able: Damaging an enemy regenerates +2% of your Maximum Health per second for 3 seconds. Crisis Management: +35% Gun Damage and +30% Melee Damage when shields are depleted. Can be replaced for Grit in the Survival tree. Double Up: Adds a second gun to the Sabre Turret and both guns fire Slag bullets. Though Gemini is superior in terms of damage, the slag damage is a big advantage later in the game. Sentry: +5 shot per burst and +10s duration for Sabre Turret. Upgrades your Turrets even further, but not necessary until later on. |
Note: Leaving only Grenadier and Laser Sight. Expanding your grenade slots can easily be done through the Black Market and the +50% Turret Accuracy could be useful, though at no point did I think “my turret needs to be more accurate.” But still useful if you’re going for a heavy turret build.
This tree and the skills above are the core of your build. From this point you can invest another 27 points into Survival to also grab Gemini for double turrets and invest your remaining 11 points into Gunpowder to allow you access to Longbow Turret. Which increases your turret deploy range, and gives +110% Turret Health.
|
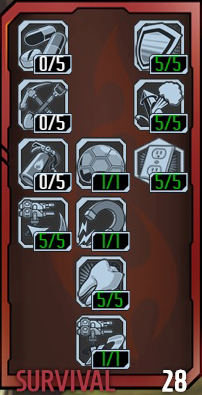
Preparation: +15% shield capacity; regenerate +2% health per second when shields are full. Pressure: Up to +70% Reload Speed and –60% Shield Recharge Delay depending on how low your health is. Quick Charge: Kill Skill. Killing an enemy regenerates +5% of your shield per second for a short time. Phalanx Shield: Your Sabre Turret projects a shield that attempts to block enemy ranged fire but lets friendly ranged attacks pass through. Resourceful: +25% Action Skill Cooldown Rate. Grit: You have a 20% chance to ignore damage that would otherwise kill you. In addition to not taking damage from the attack, you will also regain half your Maximum health. Gemini: Allows you to deploy two Sabre Turrets. |
Note: Using Mag-Lock can be useful, though not necessary, especially if you’re planning to go for Longbow Turret. Because there are times where due to the lack of space you end up placing your turret in a path which isn’t ideal. Besides that, your secondary heal becomes Preparation and Quick Charge + Pressure makes it easier to keep up your shield.

|
Impact: +20% Gun Damage and +15% Melee Damage. Metal Storm: Kill Skill. Killing an enemy gives +60% Fire Rate and +75% Recoil Reduction for a short time. Longbow Turret: +10000% Turret Deploy Range, +110% Turret Health. Battlefront: +30% Gun, Melee, and Grenade damage while turret is deployed. |
Note: The Gunpowder tree only has a few notable skills worth your points, which have been mentioned above. Battlefront is where you would put any remaining points if you have any.
In Summary
You have a very strong offensive and defensive build, regardless of whether you’re playing to lvl 50 or 72. Axton (The Commando) is a great class to start off with and learn the ropes of the game. His trusty turret allows him a great deal of leverage and soloing becomes much easier for your first playthrough, or higher difficulty modes. Always remember to make use of the turret and don’t be afraid of deploying it as soon as you feel a sense of danger.
More Relevant Posts:
Borderlands 2 – Pandora Survival Guide
Best PC Gaming Controller for You
The Best PC Games of All Time